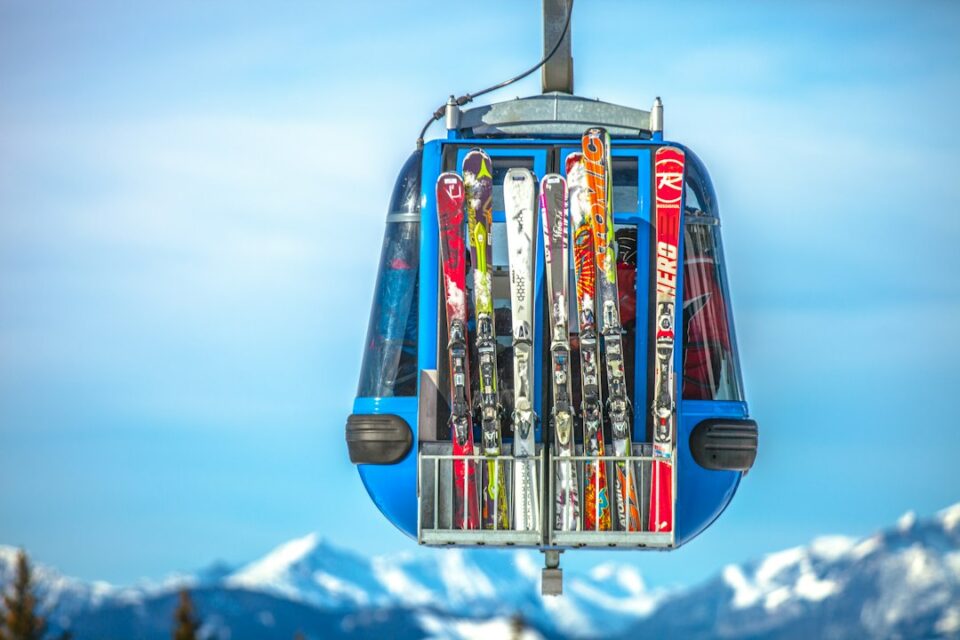
If you want fewer hassles and more laps this winter, start with a practical ski equipment maintenance checklist. The idea is simple: take a little time in the preseason and between days to inspect, tune, and organize the gear you depend on. The payoff can be smoother glide, better edge hold, less mid-day tinkering, and more confidence when weather or snow changes. This comprehensive guide turns what can feel like a vague chore into a clear series of bite-size tasks and repeatable routines for the entire season.
ski equipment maintenance checklist
Use this master list as your season-long reference. Print it, save it to your phone, or tape it to your tuning bench. Mark dates after each task so patterns are easy to spot and nothing gets overlooked when storms line up or travel days run long.
- Skis or snowboard: clean topsheets, inspect bases, repair gouges, sharpen/de-burr edges, wax for likely temperatures, scrape and brush.
- Bindings: quick visual check, heel and toe function, brake action, screw snugness, interface clean and dry.
- Boots: liners fully dry, buckles and ladders secure, footbeds supportive, cuff alignment feels natural.
- Poles: baskets tight, tips sharp enough for firm snow, straps intact, grips secure.
- Helmet: shell intact, chin strap reliable, pads comfortable and clean.
- Goggles: lenses clear and appropriate for light, anti-fog handled gently, straps elastic.
- Layers: base and mid-layers clean and dry, shells reproofed as needed, small tears patched.
- Tuning kit: iron, files, stones, waxes, scraper, brushes, P-tex, shop towels, rubber bands for brakes.
- Transport: ski ties, edge guards if used, bag or case in good shape, roof rack hardware checked.
- On-mountain routine: wipe edges at day’s end, dry liners, brush bases when needed, pocket gummi stone for quick touch-ups.
- Trip kit: spare screws, pole baskets, scraper, pocket wax, mini driver, tape, microfiber cloth.
- Logbook: note wax type, edge work, and conditions so you can repeat what felt great.
Work from top to bottom or pick the section most relevant to your next day. Consistency beats perfection here; an okay tune done regularly usually rides better than a one-time masterclass performed months ago.
Skis and snowboards: edge grip, glide, and base health
Your skis or snowboard are the direct connection to snow. A little attention to edges and bases dramatically affects control and speed, especially when surfaces go from cold chalk to wind buff or spring slush. Set up on a stable bench with good light and ventilation. If you’re new to tuning, keep your first sessions simple and gentle. You can fine-tune angles and techniques as you build confidence.
Cleaning and inspection basics:
- Wipe topsheets with a damp cloth to remove grime that can migrate to bases and hands.
- Dry the base with a clean towel so you can spot white, dry-looking patches that signal wax thirst.
- Look for deeper scratches and any edge burrs or tiny hang-ups that catch a fingernail.
- Check sidewalls for cracks or delamination. Small orange rust flecks on edges are common and lift easily with a gummi stone.
Edge work that makes a difference:
- Secure brakes with thick rubber bands so the ski lies flat. For boards, a stable vise or blocks help.
- Start with a fine diamond stone or file in a guide. Make short, consistent passes tip to tail to remove burrs and restore smoothness.
- Keep edge angles conservative until you understand your snow. Many skiers like 88–89 degrees on side edges for firm days. Riders can follow brand guidance for side and base bevels.
- Run a gummi stone lightly over tips and tails to reduce hookiness if you felt grabby last time out.
Waxing that suits real conditions:
- Brush bases with nylon to open structure, then wipe with a small splash of citrus cleaner on a towel. Let it evaporate completely.
- Drip wax in a thin zigzag while keeping the iron just above the base. Move the iron slowly with overlapping strokes so the base looks uniformly wet but never smokes.
- Allow 20–30 minutes to cool, scrape with a sharp plastic scraper, then brush with nylon and finish with horsehair for extra glide.
- Choose wax by trend not only by forecast: colder waxes for squeaky, low humidity snow; warmer for wetter spring or coastal days.
Base repair without drama:
- Shallow scratches often vanish with frequent waxing. Focus on glide, not cosmetic perfection.
- For deeper gouges away from the metal edge, clean the area, mask around it, drip P-tex, and scrape flush after it cools. Work in thin layers for a smoother plane.
- Leave core shots, pulled edges, and flatness issues to a professional shop. A stone grind can reset structure and makes at-home waxing more effective.
Signs you’re done for now: edges feel uniformly sharp without catching, the base color looks saturated rather than chalky, and a quick fingernail pass across the base doesn’t snag on repairs or residual wax. Put a date in your log so your next wax and edge pass is easy to time.
Bindings: inspection, function checks, and simple upkeep
Bindings convert body movements into snow contact. They should feel crisp, predictable, and free of surprises when you step in or release. While a certified technician should handle full function testing or adjustments, home care still matters.
Routine checks at home:
- Scan heel and toe pieces for hairline cracks, bent metal arms, and missing anti-friction surfaces. Press brakes by hand; they should extend and retract smoothly.
- Confirm visible screws sit snug with the correct driver. If a screw turns unexpectedly far, stop and consult a shop.
- Check forward pressure and toe height indicators if your model has them. Misalignment is a cue to book a shop visit.
Clean interfaces, cleaner feel:
- Wipe AFD surfaces, boot lugs, and binding tracks with a microfiber cloth so snow and wax residue don’t create stiction.
- If your manufacturer allows it, a tiny dab of silicone-safe dry lube on sliding tracks can restore smoothness. Read the manual before adding any lubricant.
- For hybrid or touring bindings, cycle the walk/ski lever, heel risers, and toe locks several times indoors to keep mechanisms moving freely.
If anything feels inconsistent, sticky, or dramatically different from the last time you clicked in, stop and visit a technician. A quick professional look is cheaper than a ruined day.
Boots: shell, liners, footbeds, and buckle hardware
Boots are your steering wheel and suspension. If they’re wet, mushy, or misaligned, the rest of your setup can feel off. Show shells and liners the same respect you give sharp edges and fresh wax.
Drying and freshness routine:
- Remove liners and footbeds after each day. Set them in a warm, ventilated place away from direct heat. Dedicated boot dryers with timers are helpful in humid climates.
- Empty pockets and take out moisture-holding accessories like heel wedges. Rotate socks so each pair fully dries before reuse.
- For odor control, dust a pinch of baking soda inside the liner overnight and tap out the excess the next morning.
Fit and function, checked fast:
- Inspect around ankles, instep, and cuff pivots for stress whitening or small cracks. These zones see the most load.
- Open and close each buckle. Make sure ladders still have crisp teeth, rivets don’t wobble, and power straps stick firmly.
- With boots on at home, buckle lightly and flex forward. Knees should track naturally over toes without collapsing inward. If you feel a constant pull to one side, a bootfitter can look at cuff alignment or canting.
Footbeds and liners keep you planted:
- Check footbeds for cracked shells, flattened foam, or moisture damage. Support that once felt firm can fade gradually and is worth refreshing.
- Look at liner tongues and heel pockets. Flattened tongues reduce shin comfort and control. Worn heel pockets let heels lift, which steals precision. Many liners accept stick-on shims to restore hold.
Shell care for the long haul:
- Wipe shells with mild soap and a damp cloth, then dry. Keep overlap areas clean so they seat smoothly when buckled.
- If allowed by your brand, a drop of silicone-safe dry lube on buckle pivots smooths operation. Skip petroleum products that can harm plastics.
Small habits add up: clean, dry boots that close easily and support your stance make the entire system feel tighter without touching the skis.
Poles and grips: small parts that keep your rhythm
Poles are simple until a basket loosens in a storm or a tip goes blunt after early-season rock gardens. Spend five minutes before the season starts and you’ll skip an annoying lift-line fumble later.
- Spin each basket clockwise to lock. If yours are press-fit, ensure they don’t wobble. Carry a spare pair on trips.
- Check tips for rounding or chips. Dull tips slip on firm snow, reducing plant confidence. Replace when worn.
- Inspect straps for fray and make sure they cinch securely. Grips should feel solid with no twist on the shaft.
For adjustable touring poles, open and close each lock a few times. Wipe the clamping surfaces, then set tension so the section doesn’t collapse under body weight. In cold, lock mechanisms can stiffen; cycling them indoors first pays off.
Helmet, goggles, and protection: clear vision and steady confidence
Head comfort and vision are non-negotiable on cold mornings and storm days. A little routine preserves clarity and keeps fit feeling familiar from day one.
- Helmet: check for cracks, deep dents, brittle straps, or padding that no longer adheres. Follow maker guidance on replacement age.
- Goggles: inspect lenses for scratches and lifted coatings. Clean the inside gently with a dedicated goggle cloth. Avoid aggressive rubbing that can damage anti-fog layers.
- Carry two lenses or two goggles: one low-light option for storms and one bright-sun lens. Swap as weather changes so your eyes relax.
- Fit: check helmet-goggle seal along the brow to limit spindrift. Verify goggle straps still offer strong elastic return.
If fogging sneaks in on lifts, set goggles lens-out on a dry shelf or in a pocket away from wet gloves. A small microfiber cloth lives happily in a chest pocket and saves runs.
Apparel: layers, waterproofing, and small repairs
Comfort is a system built from base to shell. Keep moisture moving away from your skin, hold warmth in the middle, and block wind and wet on the outside. Then maintain each layer so it keeps performing after repeated storm cycles.
Quick checks and easy wins:
- Open jackets and pants to inspect seam tape. If it peels at short sections, a warm iron through a pressing cloth can help it re-adhere. Larger failures call for a repair shop.
- Run all zippers. Replace broken pulls and tag snags now rather than on a windy ridge.
- Refresh durable water repellency on shells with a wash-in or spray-on product. Clean first with a technical detergent, rinse well, then activate per product directions.
- Patch small nicks with fabric repair tape. Round the patch corners to reduce peeling.
Hands, head, and feet:
- Match gloves or mitts to the day. Lightweight, dexterous gloves feel great in mild temps. Insulated mitts shine in mid-winter storms.
- Air-dry gloves and socks fully after every day. Rotate pairs on multi-day trips so one set rests while the other works.
- Neck gaiters and beanies collect sweat and sunscreen; wash them often so skin feels comfortable and fabric stays stretchy.
When layers work well, you think less about comfort and more about the line in front of you. Keep a small repair kit at home with seam grip, repair tape, spare zipper pulls, and a needle with heavyweight thread.
Tuning tools and wax: build a simple, capable kit
You do not need a race room to keep gear gliding well. A compact kit travels easily and covers routine care at home or on the road. Label tools so they find their way back, and keep a small notebook with your favorite wax and edge notes for different regions and temperatures.
- Edge tools: side-edge guide (88–89 degrees), diamond stones (medium and fine), a mill file, a gummi stone, brake bands.
- Wax kit: flat-plate iron, universal wax plus one colder and one warmer option, sharp plastic scraper, nylon and horsehair brushes.
- Repair: P-tex candles (black and clear), metal scraper, craft knife, masking tape for clean repair lines.
- Cleaning: citrus cleaner, microfiber cloths, shop towels, a small handheld vacuum or brush for shavings.
Wax choices made simple:
- Universal wax is the default around freezing or when you’re not sure. It’s reliable across many days.
- Colder-range wax perks up glide on squeaky, cold snow. If the air bites your cheeks and crystals sparkle like sugar, go colder.
- Warmer-range wax helps in spring or maritime climates. Brush thoroughly to clear the base structure so water can channel away.
Eco-minded habits are easy: choose fluorine-free waxes, and collect scrapings in a bin for proper disposal. A sharp scraper and thorough brushing after each wax often matter more than chasing exotic formulas.
Storage and transport: protect edges, bases, and structure
How you store and move gear affects how it performs. Little dings become base work later. Moisture left on edges becomes rust spots. Build a simple routine so performance remains predictable day after day.
Drying routine at home:
- At day’s end, wipe edges with a cloth so meltwater doesn’t sit on metal overnight.
- Stand skis on a mat or hang boards so tails don’t wick water from concrete floors.
- Keep gear away from furnace blasts or direct heaters that can warp plastics or dry out liners unevenly.
Smart travel setups:
- For car trips, use ski ties to protect edges and keep bases together. If you waxed recently, place a soft cloth between bases.
- Roof racks deserve a seasonal check. Verify clamps or straps lock smoothly and pads are intact. Give the whole system a gentle shake before driving.
- For flights, hard cases provide the most protection. With soft bags, add clothing around tips and tails, and slide a thin cardboard sheet along edges to reduce scuffs.
Off-season hibernation:
- Hot-scrape to lift dirt, then apply a thick storage wax and do not scrape. The wax seals bases from dust and air.
- Back buckles off to the first catch so shells relax without deforming. Stuff a small towel in each cuff to hold shape.
- Store in a cool, dry closet out of direct sun. Skip attics, sheds, and damp basements where temperature swings and humidity work against plastics and adhesives.
A careful storage routine means your first turns next season feel like mid-season form. You save time when excitement is at its peak.
On-mountain daily routine and quick fixes
Great days often come down to small, repeatable habits. A quick wipe here, a light brush there, and your setup keeps feeling dialed without a lengthy tuning session. Build these into your first lift, lunch break, and last run.
- Before first run: tap poles together to confirm basket tightness, brush snow off boot soles so bindings interface cleanly, and check goggle lens choice against light.
- Mid-day: if a tiny edge catch appears, glide a pocket gummi stone lightly along that section to smooth it. If glide feels slow in warm snow, wipe bases with a dry cloth to clear dirty film.
- Last run: separate skis, wipe edges, and open boot buckles two notches for a relaxed walk to the car. Crack jacket zippers to help layers begin drying.
Weather-specific habits:
- Storm days: carry a second microfiber cloth and a low-light lens. Keep goggles away from wet gloves. Knock snow off brakes before stepping in.
- Sunny cold days: bring a thin face cover and consider a colder-range wax if snow squeaks. A quick horsehair brush at lunch can refresh glide.
- Spring slush: warm-range wax and a nylon brush in the car help. Clear slush from bindings to keep step-in crisp.
Minutes invested during the day avoid bigger chores later and extend the sweet spot of a good tune.
Trip checklist and spares kit
Trips magnify small oversights. A spare lens or a pocket scraper can salvage a storm day or save a long drive back to town. Here’s a lean kit that lives in a duffel or glove box and a packing list that prevents last-minute scrambles.
Trip gear highlights:
- Skis or board, poles, boots, helmet, goggles with low-light and bright lenses, gloves plus thin liners, socks, neck gaiter, beanie.
- Outerwear: shell jacket and pants, insulating mid-layer matched to climate, base layers top and bottom, backup midweight for surprise cold.
- Accessories: sunscreen stick, lip balm, microfiber cloth, snacks, water bottle, phone leash, ID and pass.
Spares kit that punches above its weight:
- Small wax block and plastic scraper, pocket gummi stone, microfiber cloth for lenses and bases.
- Mini driver set matched to binding screws, a few spare screws, and a thread-locking stick.
- Two spare pole baskets, zip ties, a few feet of duct tape wrapped around a pole, and sturdy multi-use tape that sticks in cold.
- Hand warmers, thin liner gloves, and a small pill bottle of spare nose and ear pads for goggles or helmet.
Before you roll away, lay items on the floor for five minutes. Seeing everything at once catches the missing second sock, the forgotten scraper, or the lens you swore was in the other pocket.
Budget planning, service versus DIY, and sustainability
Care is cheaper than repair, and a simple plan balances at-home work with professional support when it matters. A small, steady investment pays back in glide, edge life, and fewer peak-season shop waits.
Service calendar with cost-savvy choices:
- At home: light de-burring every one to two days on firm snow; universal wax every two to four days depending on mileage and feel; warmer or colder waxes matched to trips.
- Shop support: base grind and fresh stone structure at the start of a heavy season or after rock hits; professional repair for core shots or pulled edges; annual binding function check by a technician.
- Tool sharing: split a waxing iron, brushes, and edge guide with a partner or housemates. Label the kit and keep a shared log.
DIY or shop, how to decide:
- DIY: routine waxing, light edge touch-ups, superficial P-tex fills, cleaning and inspections. These tasks reward consistency and don’t require specialized machines.
- Shop: base flatness issues, edge replacement, delamination, cracked sidewalls, or any binding work beyond basic screws and surface cleaning.
Lower-impact choices for the win:
- Choose fluorine-free waxes and collect scrapings for proper disposal. Many local shops accept waste or advise on local guidelines.
- Repair rather than replace when feasible: new glove liners, patch kits, and resoling boot soles can extend lifespan.
- Buy durable, organize well: a quality brush, sharp scraper, and simple edge guide outlast piles of disposable odds and ends.
Keep receipts or a simple work log of what you did and when, plus the snow type and temperature. Over a season that record reveals what truly improved feel and where you can spend less effort without sacrificing glide or grip.
Season-long examples: timing your tune and learning from conditions
Real-world timing helps translate the checklist into rhythm. Here are three common seasonal arcs and how maintenance adapts to each without adding complexity to your life.
Early season on firm man-made snow:
- Edges: light de-burr after each day. Firm snow magnifies small burrs and rewards consistent touch-ups more than dramatic filing sessions.
- Wax: universal or colder-range depending on humidity. Cold, dry nights point toward colder wax; around-freezing days can still ride well on universal.
- Bases: expect occasional small scratches from thin cover. Save deep work for mid-season unless a gouge distracts.
Mid-winter with mixed storms and packed powder:
- Edges: maintain angles if you enjoy carving days. A quick gummi stone pass on tips and tails avoids twitchiness when soft snow returns.
- Wax: universal most days, with warmer-range if the storm feels humid. Brush thoroughly to keep bases fast across variable snow.
- Boots: liners dry fully every night and footbeds checked monthly for compression lines that creep in unnoticed.
Spring with freeze-thaw cycles and slush:
- Edges: keep them smooth rather than razor sharp. You’ll value glide and stability over grip in heavy snow.
- Wax: warmer-range becomes your friend. A fresh wax the night before a warm day keeps bases from feeling grabby.
- Apparel: reproof shells and carry lighter gloves. Clear slush from bindings and scrape off dirt film with a towel at lunch.
A simple note after each day such as “88 side, universal wax, packed powder 25 F, felt awesome” becomes gold when a similar forecast pops up later. Repeat what worked and skip what didn’t.
Common mistakes and how to avoid them
Even experienced skiers and riders fall into the same avoidable traps. Steering around them keeps your maintenance short and effective.
- Overfiling edges: removing too much metal in one session shortens edge life. Focus on burr removal and consistency.
- Iron too hot: smoking wax signals heat risk. Keep the iron moving and aim for a glossy, wet appearance rather than sizzle.
- Skipping the brush: scraping alone leaves the base structure clogged. A few brisk passes with nylon and a light finish with horsehair transform glide.
- Wet liners back into shells: moisture trapped against plastic encourages odor and discomfort. Let liners fully dry before reassembly.
- Ignoring brakes and AFDs: dirty interfaces reduce predictable step-in and release feel. Wipe them as part of your routine.
- Packing last minute: missing a lens or gloves can cost an hour and a good parking spot. The five-minute floor lay-out catches surprises.
Think of the checklist as a way to skip headaches, not another chore. The goal is a setup that feels familiar every day you click in, with just enough attention to keep it that way.
Your next step: set a simple schedule and keep a small log
Turn this article into action with three concrete moves. First, decide your baseline rhythm: for many skiers that looks like a light edge de-burr every one to two days on firm snow and a universal wax every two to four days depending on mileage. Second, assemble the small kit listed earlier and label each tool. Third, start a tiny logbook in your phone notes capturing snow type, temp, wax used, edge work, and how it rode.
Those three steps keep your ski equipment maintenance checklist alive all season. When conditions change, you can repeat exactly what worked last time or adjust with confidence. For more seasonal checklists and lifestyle guides that pair well with winter sports, browse the latest articles on In Health Today. See you out there.